

Building a Serverless Node.js Application with CI/CD and Monitoring :serverless framework


in simple terms, "serverless" refers to a cloud computing model where you don't have to worry about managing servers. Instead of dealing with server infrastructure, you can focus on writing code for your applications, and the cloud provider takes care of everything behind the scenes.
serverless cloud uses a combination of aws sdk, cli and cloud dashboard to easily building, deploy and monitor the application
1. No Server Management:
- In a serverless model, you don't need to worry about provisioning, scaling, or maintaining servers. The cloud provider automatically handles these tasks for you.
2. Event-Driven:
- Serverless applications are event-driven, meaning they respond to specific events or triggers, such as an HTTP request, file upload, or database change. Each function (a piece of code) is designed to handle a specific event.
3. Pay-as-You-Go Pricing:
- With serverless, you only pay for the actual compute resources your functions use during execution. You're not charged for idle time, making it cost-effective for many use cases.
4. Automatic Scaling:
- Serverless platforms automatically scale your application based on demand. If there's a surge in requests, the platform scales up to handle the load. When demand decreases, it scales down to save costs.
5. Use Cases:
Web Applications: You can build the backend of web applications using serverless functions to handle HTTP requests.
Data Processing: Serverless is great for processing data, such as resizing images, analyzing logs, or transforming data in a database.
Automation: Automate tasks and workflows without managing servers.
Before we start, ensure you have the following prerequisites:
🔧 EC2 Instance:
- Access to an AWS EC2 instance to run your serverless project.
📦 Node.js and npm:
- Install Node.js version 20 and npm version 10 on your EC2 instance.
💼 Serverless Framework:
- Install the Serverless Framework globally:
npm install -g serverless.
🔑 AWS Credentials:
install aws cli also.
AWS access and secret keys with admin access to connect with your AWS account.
so lets start the project-
high level of workflow is - in serverless architecture, code is often stored in s3 bucket, when you deploy a server less application, you typically package your code and dependencies into a deployment package, which is then uploaded to s3 bucket. lambda function which execute the code and triggered by the event like api requests in this case. During the deployment process, the Serverless Framework packages your application code and dependencies into a zip file. This package is then uploaded to an S3 bucket. The generated CloudFormation template references this S3 bucket, and AWS Lambda retrieves the deployment package from S3 when setting up or updating the function.
🛠️ Serverless Framework: We'll use the Serverless Framework, a popular choice for simplifying serverless deployment.
Install the Serverless Framework:
Make sure you have Node.js installed on your machine.
Install Serverless Framework globally using npm:
npm install -g serverless.
Set Up Your Project:
Create a new directory for your project and navigate to it.
Run
serverless --org=kpuserto create a new service.after this comamnd - a serverless.yml file will be created automatically.When you run the
serverless createcommand, it initializes a new Serverless Framework project by generating some essential files and folders, including theserverless.ymlfile. Here's a simplified overview of how this process works:The Serverless Framework uses a default template or a specified template (if provided) to create the necessary project structure. it creates a cloudformation template stack in cloudformation service in AWS.
in serverless file - there is a provider which is cloudformation, In the Serverless Framework, the
providersection in theserverless.ymlfile is used to define the cloud provider-specific configurations for your serverless application. This section specifies which cloud provider you are deploying to (e.g., AWS, Azure, Google Cloud), as well as any provider-specific settings.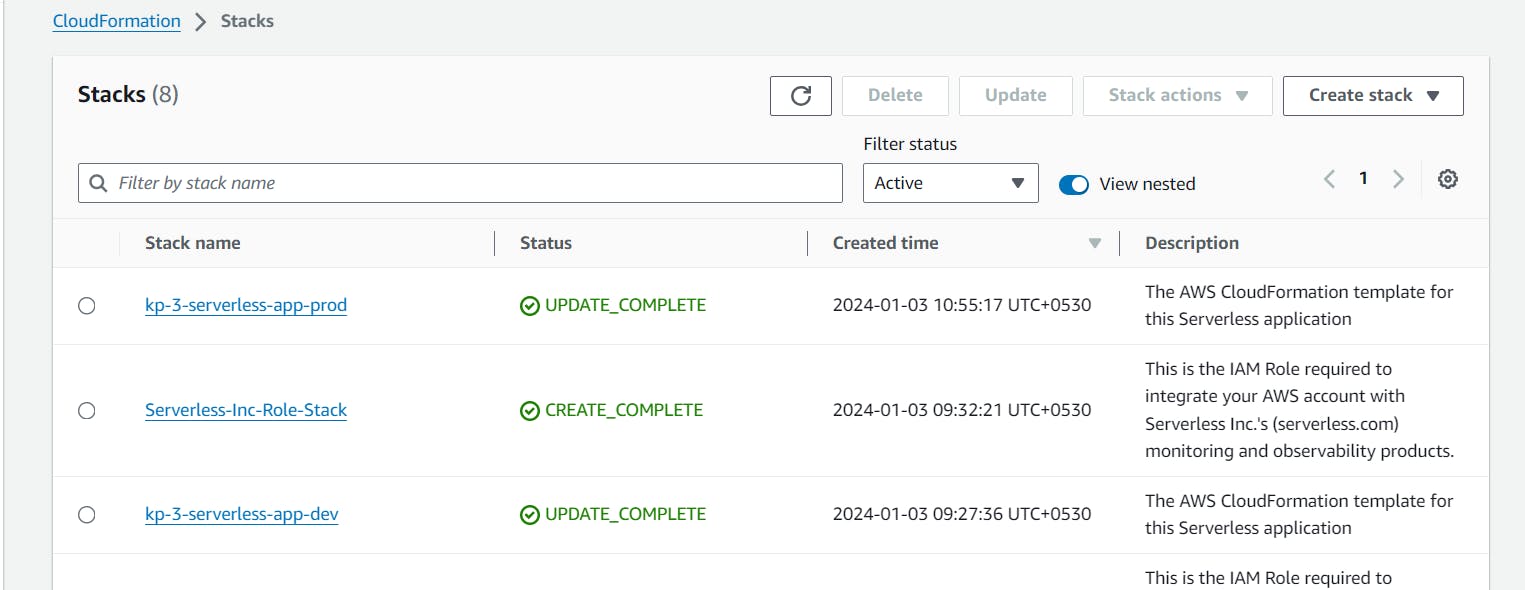
Write Your Code:
serverless.yml file is
  org: kpuser
  app: lasthope
  service: kp-3-serverless-app
  frameworkVersion: '3'

  provider:
    name: aws
    runtime: nodejs14.x
    region: us-east-1
    iamRoleStatements:
      - Effect: Allow
        Action:
          - dynamodb:*
        Resource:
          - arn:aws:dynamodb:us-east-1:800971184248:table/KaamKaro

  functions:
    hello:
      handler: src/hello.handler
      events:
        - httpApi:
            path: /
            method: get
    kaamBharo:
      handler: src/kaamBharo.handler
      events:
        - httpApi:
            path: /kaam
            method: post
    kaamDikhao:
      handler: src/kaamDikhao.handler
      events:
        - httpApi:
            path: /kaam
            method: get
    kaamKhatamKaro:
      handler: src/kaamKhatamKaro.handler
      events:
        - httpApi:
            path: /kaam/{id}
            method: put

  resources:
    Resources:
      KaamKaro:
        Type: AWS::DynamoDB::Table
        Properties:
          TableName: KaamKaro
          BillingMode: PAY_PER_REQUEST
          AttributeDefinitions:
            - AttributeName: id
              AttributeType: S
          KeySchema:
            - AttributeName: id
              KeyType: HASH
Develop your serverless application code. in serverless.yml file - The purpose of this file is to provide configuration details to the serverless framework, helping it understand how to deploy and manage your serverless application. **Provider Configuration, function Definitions, IAM Role Statements, resources (**DynamoDB tables, S3 buckets).
I made three functions in src folder-
hello.js- Hello FunctionPurpose:
- Sends a simple "Hello" message from the serverless app.
Workflow:
Receives an HTTP GET request at the root path (
/).Responds with a 200 status code and a JSON message: "Hello From kp-serverless app."
kaamBharo.js - Kaam Bharo Function
Purpose:
- Adds a new "kaam" (task) to the DynamoDB table.
Workflow:
Receives an HTTP POST request at the
/kaampath.Parses the incoming JSON payload to extract the "kaam" content.
Generates a unique ID for the new kaam.
Records the kaam, along with metadata (ID, creation time, completion status), in the "KaamKaro" DynamoDB table.
Responds with a 200 status code and the details of the newly added kaam.
kaamDikhao.js - Kaam Dikhao Function
Purpose:
- Retrieves a list of all "kaam" items from the DynamoDB table.
Workflow:
Receives an HTTP GET request at the
/kaampath.Scans the "KaamKaro" DynamoDB table to fetch all stored kaam items.
Responds with a 200 status code and a JSON array containing the retrieved kaam items.
kaamKhatamkaro.js - Kaam Khatam Karo Function
Purpose:
- Updates the completion status of a specific "kaam" item in the DynamoDB table.
Workflow:
Receives an HTTP PUT request at the
/kaam/{id}path, where{id}is the unique identifier of the kaam item.Parses the incoming JSON payload to extract the new completion status.
Uses the "id" from the path parameters to locate the specific kaam item in the DynamoDB table.
Updates the completion status of the kaam item.
Responds with a 200 status code and a message indicating the successful completion of the kaam.
These functions collectively form a serverless application for managing and interacting with a list of tasks (kaam) stored in a DynamoDB table named "KaamKaro." The application provides basic CRUD (Create, Read, Update, Delete) operations for task management.
now deploy the code - By serverless deploy command.
code will be there in s3 buckets and lambda functions also created

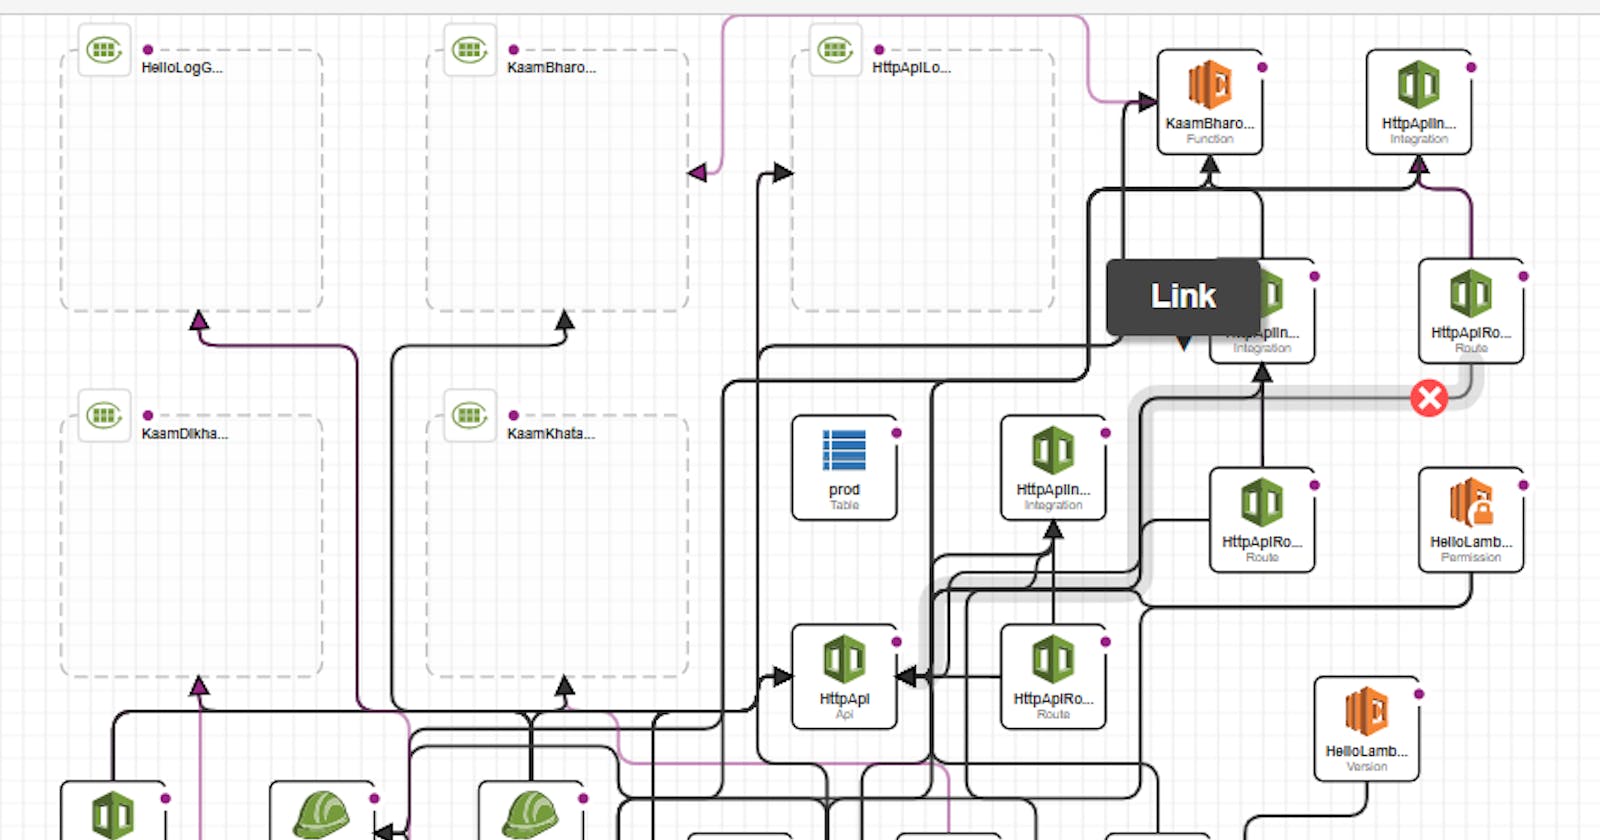
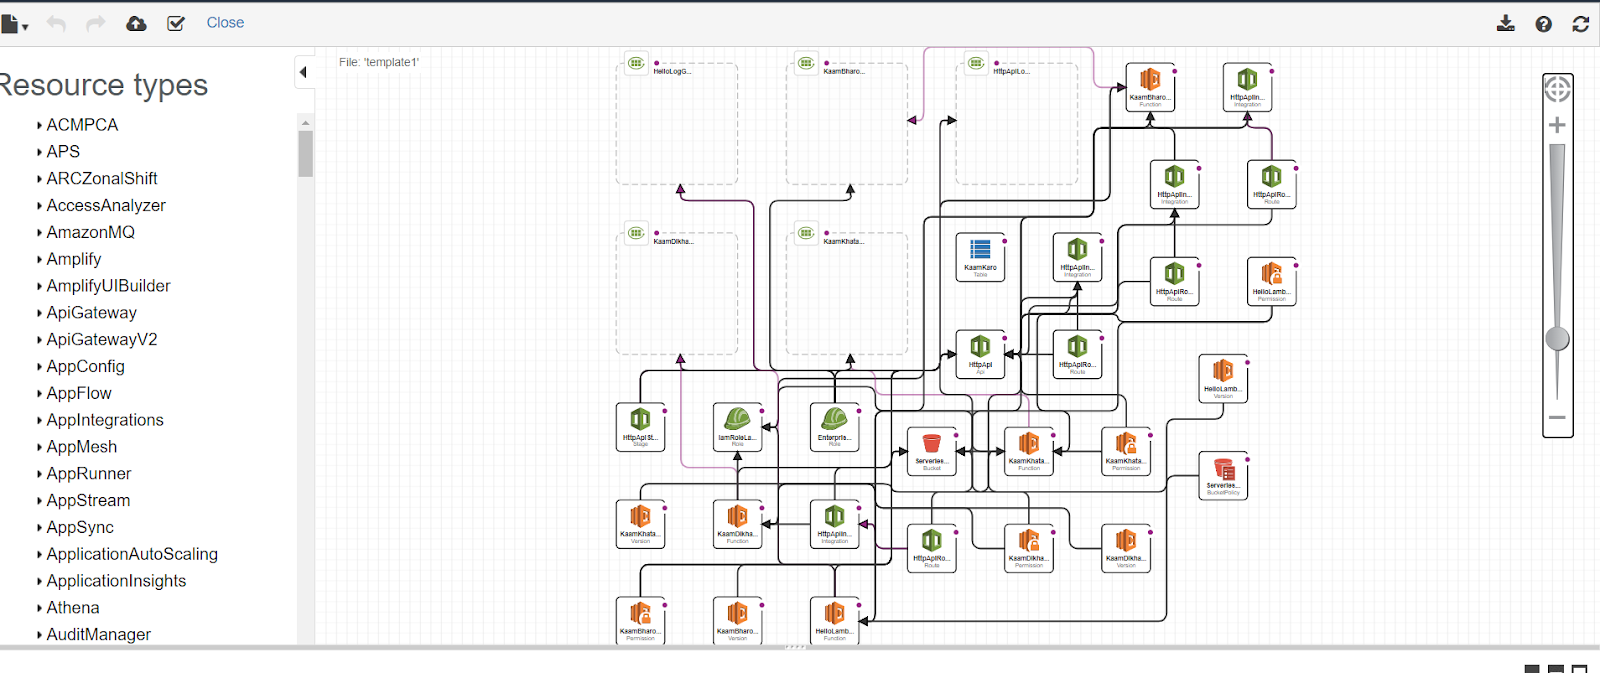
if i see the CFT designer template - here all the components are connected and shows the workflow-
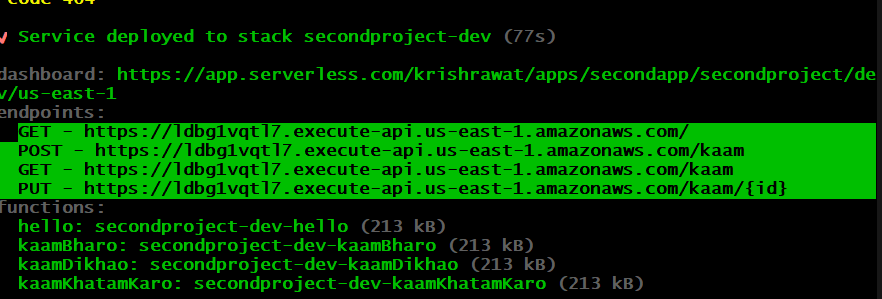
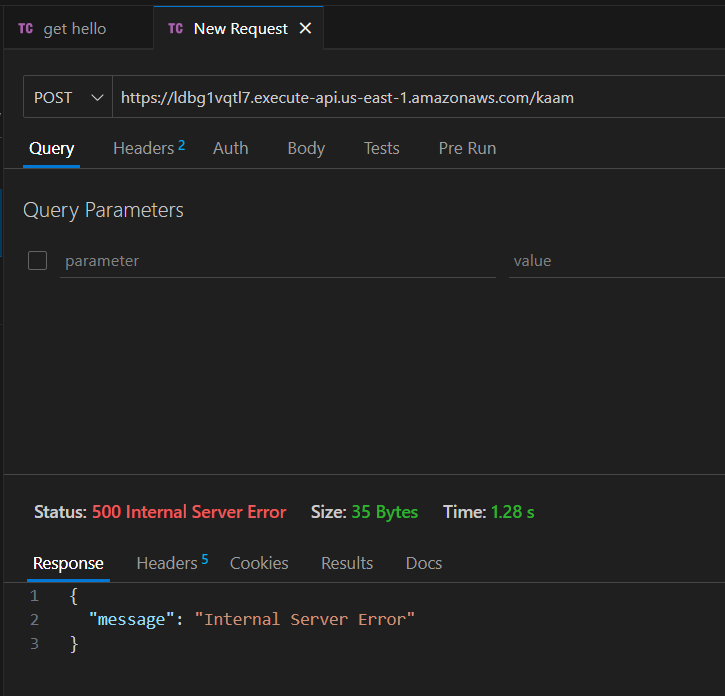
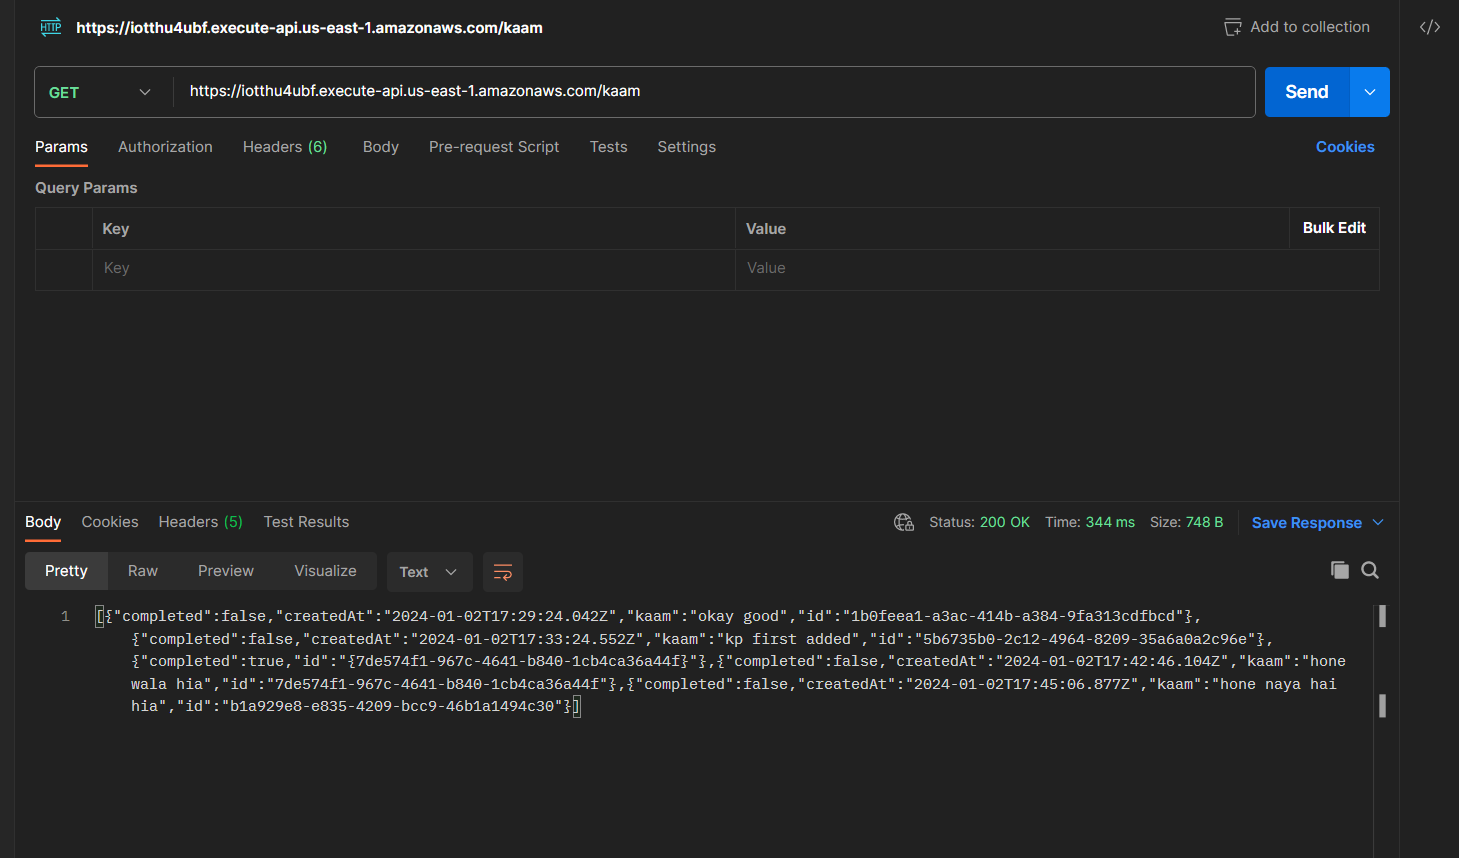
In the output we got the 4 endpoints: This we have to hit on the postman/or in thunder client (vs code). then we can see all the data in AWS DynamoDB table.
as a result I faced many errors like - access denied, uuid not found. which i resolve by Installing npm and giving the dynamoDB permission to the iam role
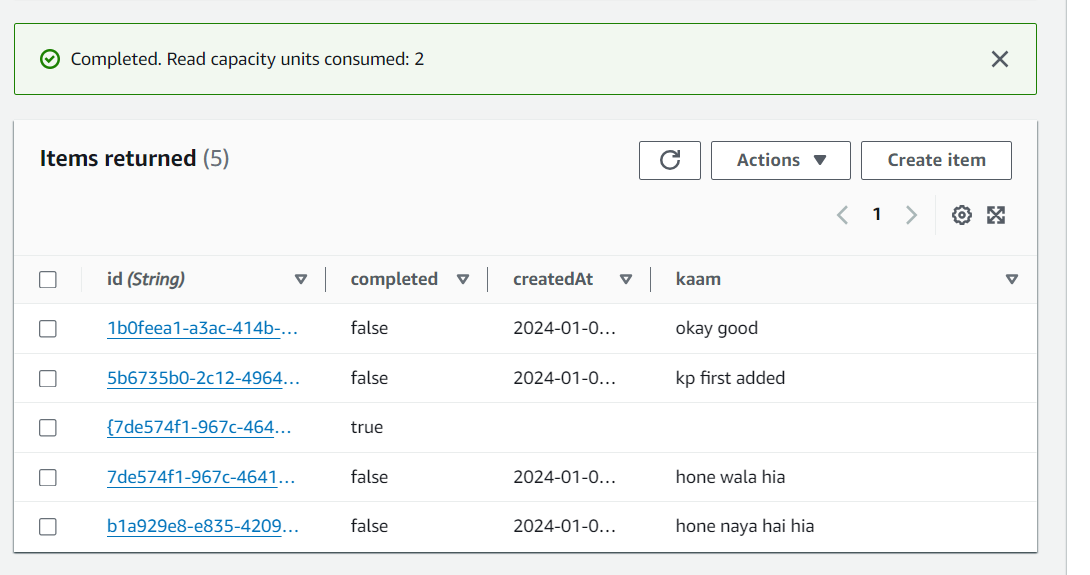
after successfully deploy again - i made a requests and i saw the data in DynamoDB table -


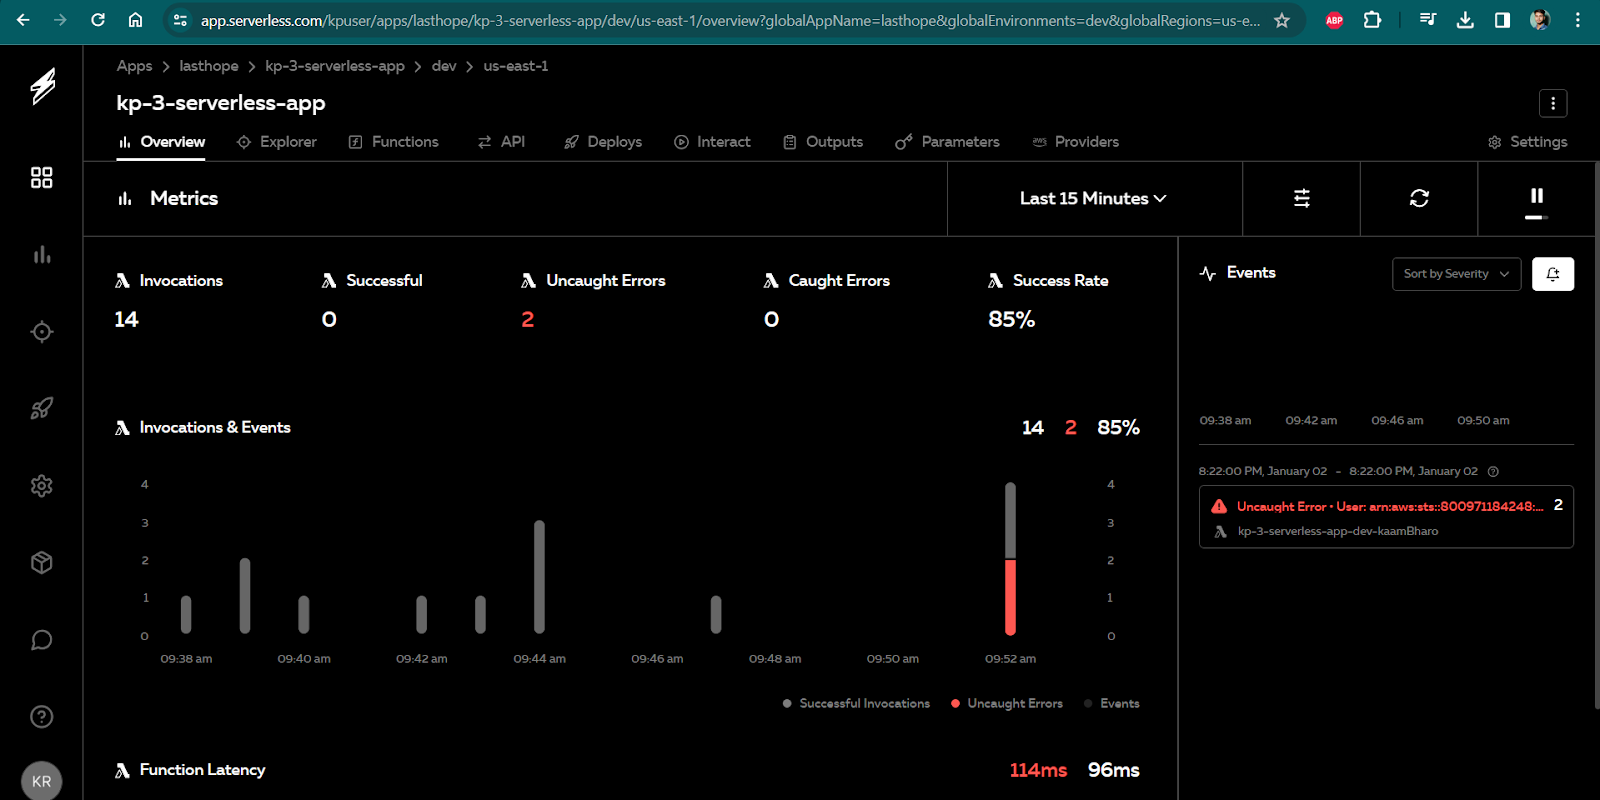
In server-less UI -- we can also see the whole metrics of our requests-
if i se ls -a in terminal => we saw a .serverless folder and under it a serverless-state.json file there. here all the state is saved whtever we did. (just like terraform does).

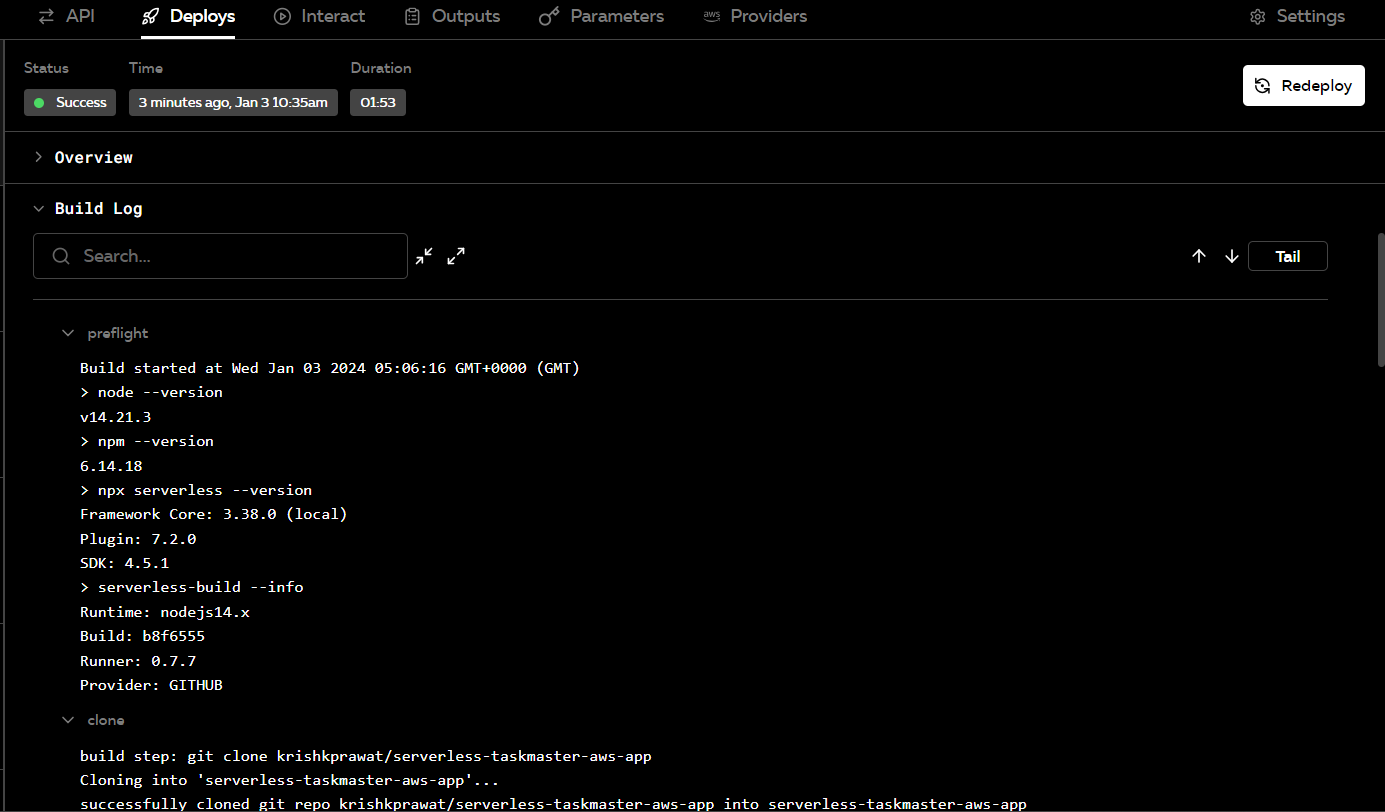
CI CD in serverless-
Goto app in serverless GUI - settings - add - Github- ADD provider- add aws acesskey.
add branch name and stage to it. from here, serverless creats a agent and deploys code from git hub

2. now, goto github and made the changes in any file- i made changes in hello.js
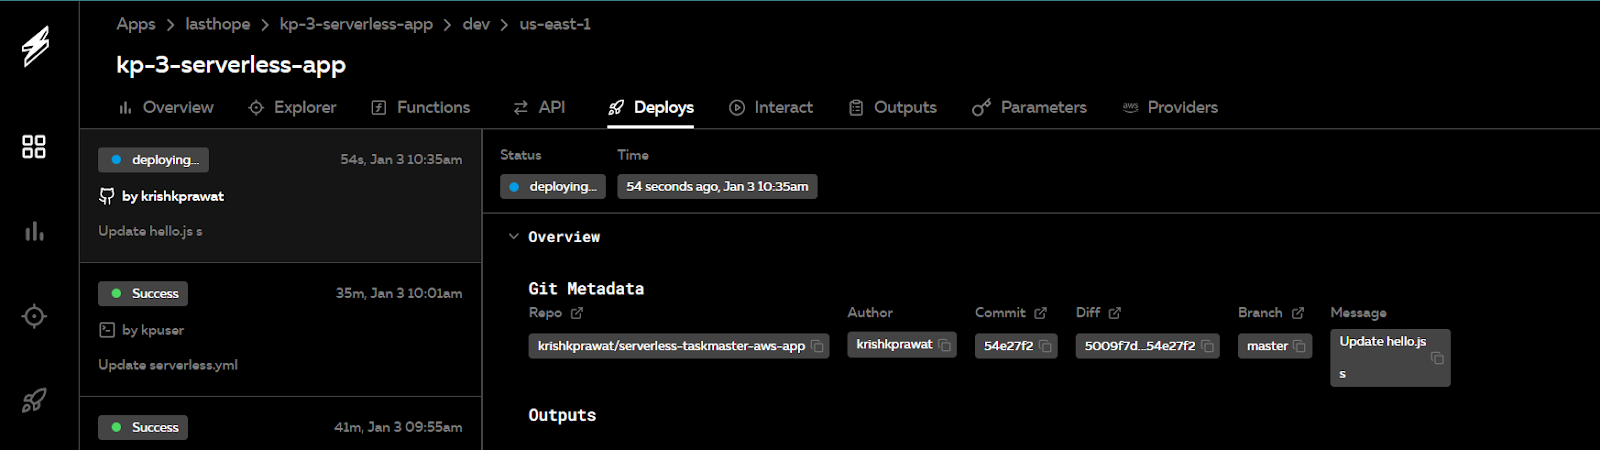

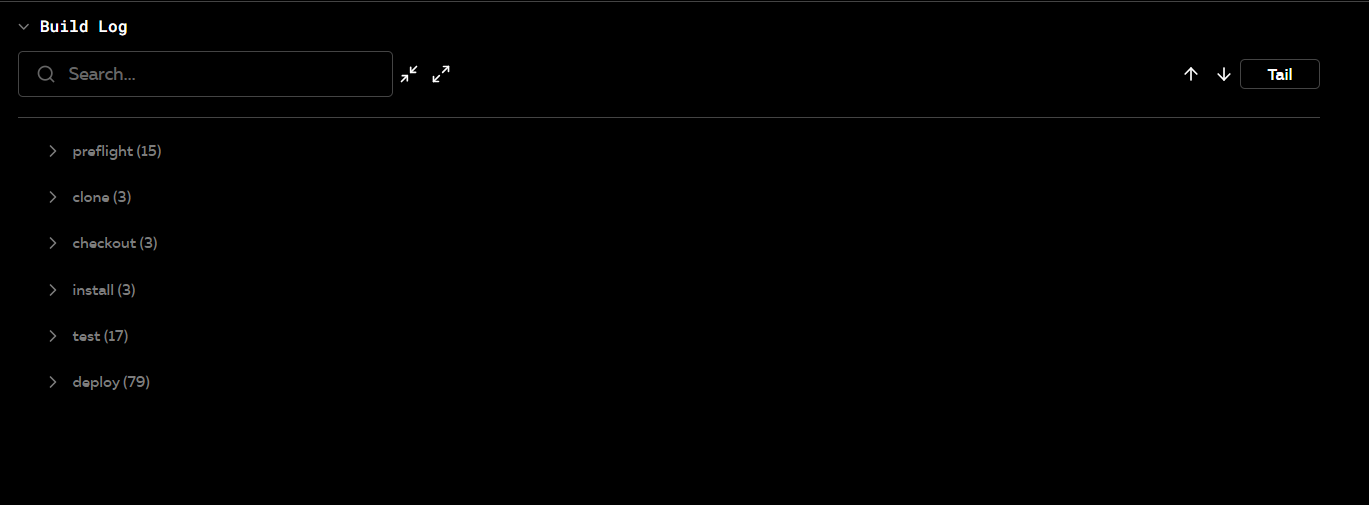
all the logs of CICD HERE-
Multi environment deploy-
Deploying to multiple environments in Serverless Framework typically involves using stages. A stage represents a deployment environment, such as dev, staging, or prod. Each stage can have its own set of configurations, allowing you to deploy and manage your application in different environments.
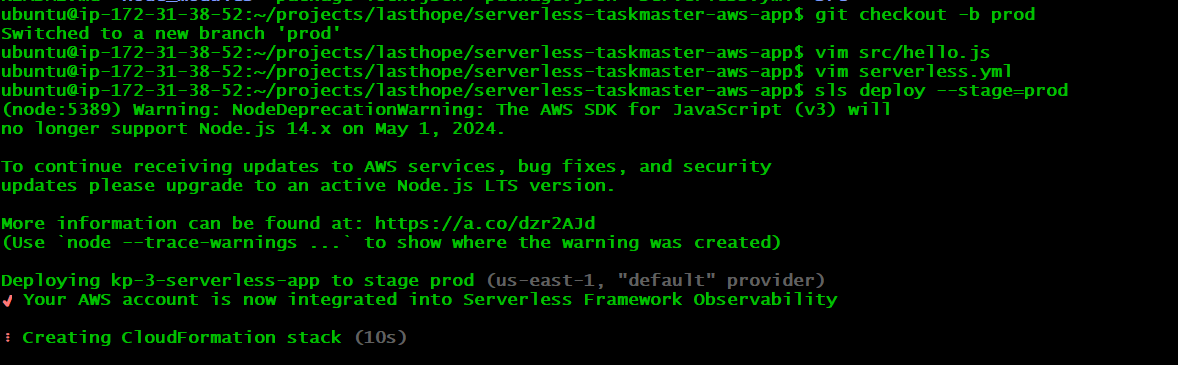
make a new branch- git checkout -b prod
When deploying, specify the target stage using the
--stageoption.
serverless deploy --stage prod
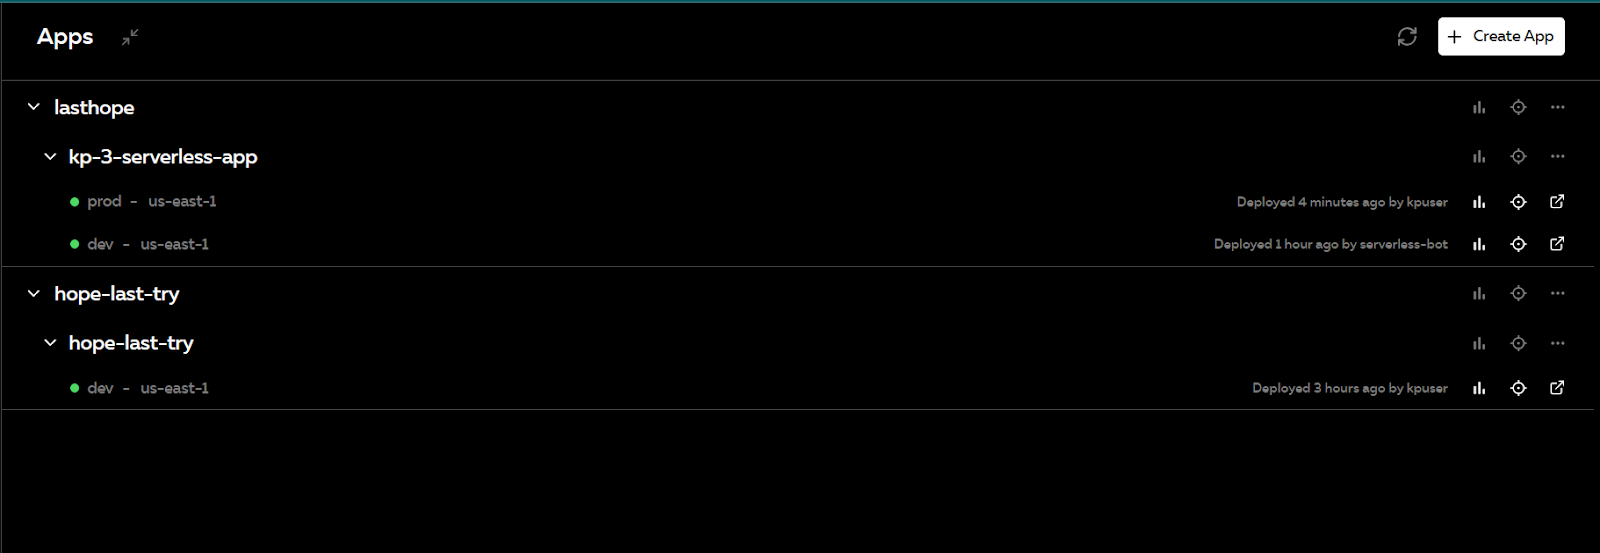
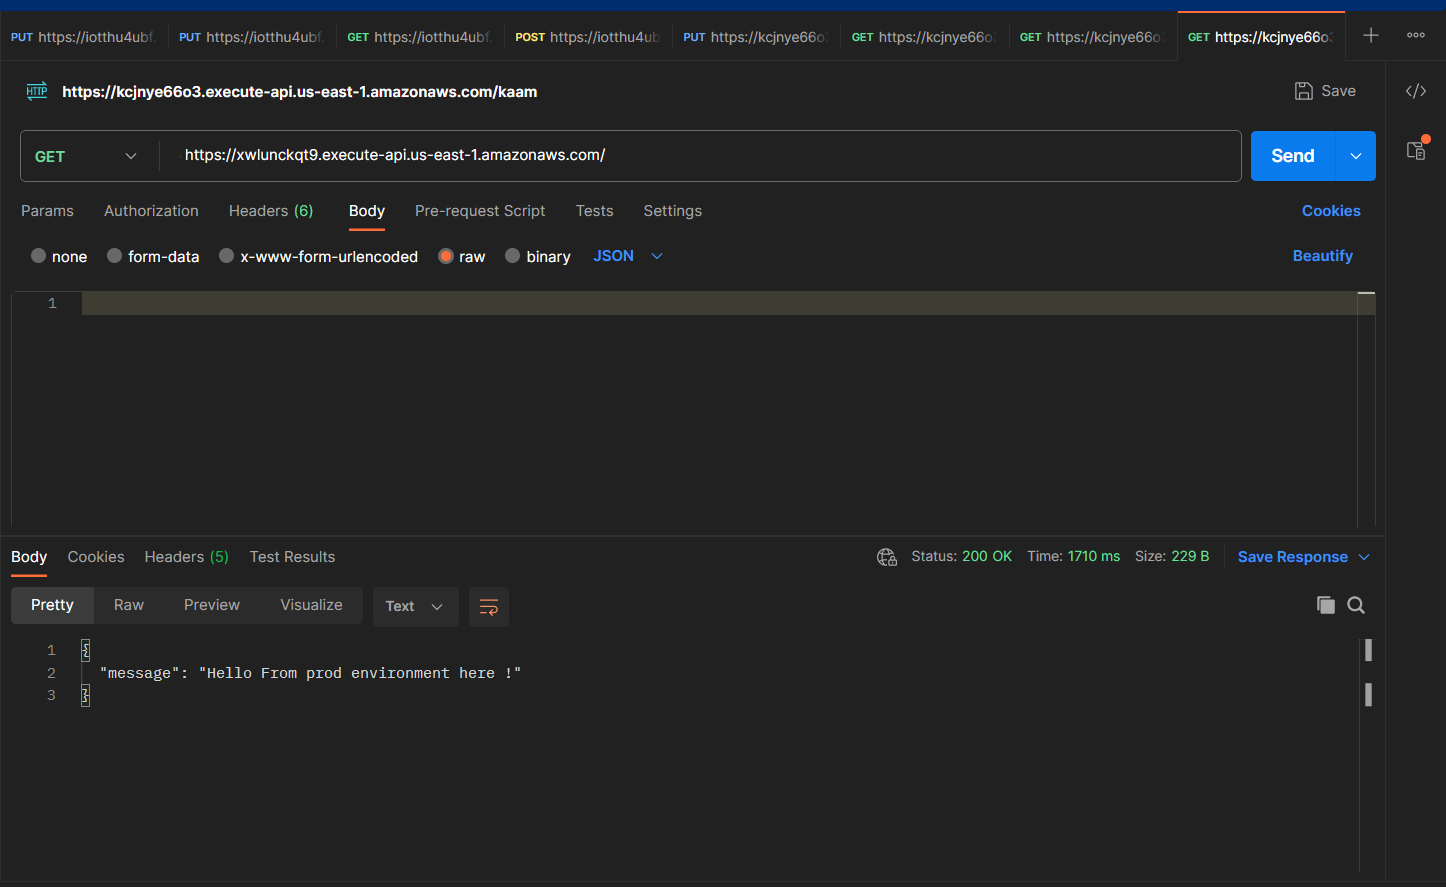
hit the endpoint and you will see the results from prod environment -
IF YOU WANT TO USE GITHUB ACTION THEN -easily into github repo -Create a main.yml file to define the workflow configuration
After ticking all the prerequisites, create a file called main.yml in folder .github/workflows and paste this code
name: Deploy Serverless App

on:
  push:
    branches:
      - master
      - develop

jobs:
  deploy:
    name: Deploy
    runs-on: ubuntu-latest

    strategy:
      matrix:
        node-version: [14.x]

    steps:
    - name: Checkout Code
      uses: actions/checkout@v2

    - name: Use Node.js ${{ matrix.node-version }}
      uses: actions/setup-node@v1
      with:
        node-version: ${{ matrix.node-version }}

    - name: Deploy Serverless App
      uses: serverless/github-action@master
      with:
        args: deploy
      env:
        AWS_ACCESS_KEY_ID: ${{ secrets.AWS_ACCESS_KEY_ID }}
        AWS_SECRET_ACCESS_KEY: ${{ secrets.AWS_SECRET_ACCESS_KEY }}
OR IF YOU WANT TO USE JENKINS FILE THEN-
pipeline {
    agent any

    environment {
        AWS_ACCESS_KEY_ID     = credentials('AWS_ACCESS_KEY_ID')
        AWS_SECRET_ACCESS_KEY = credentials('AWS_SECRET_ACCESS_KEY')
    }

    stages {
        stage('Checkout') {
            steps {
                script {
                    // Checkout the code from your version control system
                    checkout scm
                }
            }
        }

        stage('Install Dependencies') {
            steps {
                script {
                    // Install Node.js dependencies
                    sh 'npm install'
                }
            }
        }

        stage('Deploy to Serverless Framework') {
            steps {
                script {
                    // Deploy using Serverless Framework
                    sh 'npx sls deploy'
                }
            }
        }
    }

    post {
        success {
            // Add any post-deployment steps if needed
        }
    }
}
see the github repo - https://github.com/krishkprawat/serverless-taskmaster-aws-app.
thanks for reading and happy learning :)